If you’ve ever stood in front of a rocky hillside in the mountains, you probably felt that mix of peace and awe that only nature can give. Tiny plants nestled in cracks, bold flowers peeking out between stones, and moss clinging stubbornly to shaded corners—it’s nature’s artistry. That beauty is what makes the idea of building an Alpine Rockery so appealing. You don’t need to climb to the Alps to see it. You can bring it right into your own backyard.
But here’s the truth: creating an Alpine Rockery isn’t about randomly stacking stones and tossing in a few plants. If you do it that way, you’ll end up with a pile of rocks that looks like it slid down your driveway after a storm. I made that mistake once, eager to finish quickly. It looked more like rubble than a garden feature. After a few months of trial and error, I realized it takes thought, patience, and a little creativity.
So, if you’ve been dreaming of building one yourself, I’ll walk you through the process step by step. Think of me as that neighbor leaning over the fence, telling you how I figured it out after making all the rookie mistakes. You’ll get practical steps, plant tips, and even a few personal stories that might save you from headaches. By the end, you’ll not only know how to set up your Alpine Rockery—you’ll be itching to get your hands dirty.
Step 1: Choose the Right Spot
Every garden has its star corners, and your Alpine Rockery deserves one. Look for a place with good sunlight. Most alpine plants thrive in full sun, though a little shade at certain times of day won’t hurt. A slope or raised area works wonders because it naturally mimics a mountain side. If you don’t have one, don’t worry—you can build it up with soil and rocks.
Avoid soggy spots. Alpine plants like sharp drainage. Think about their natural home: rocky slopes where water runs off quickly. If you plant them in a wet patch of your yard, they’ll sulk or rot away.
Step 2: Gather Your Materials
You’ll need rocks, and not just any old rocks from a demolition pile. Choose stones that look natural together. Granite, sandstone, or limestone are great. Don’t mix too many types, or it’ll look messy. I once grabbed whatever was cheap at the quarry, and my first rockery looked like a stone dealer’s showroom. Lesson learned: consistency is key.
You’ll also need sharp sand, grit, and soil. Alpine plants hate compact clay. Mixing in grit and sand keeps things free-draining. Keep a wheelbarrow handy—you’ll be moving more material than you think.
Step 3: Plan the Layout
Before you start digging, sketch out your design. Don’t panic—it doesn’t have to be architectural. Just rough lines showing where the biggest rocks will go and how the slope should look. Imagine how water will flow down it when it rains.
Think natural, not symmetrical. If every rock is neatly lined up, it’ll look like a landscaping project from a shopping mall. Scatter heights, angles, and layers. Pretend you’re recreating a slice of mountain. That’s the beauty of an Alpine Rockery—it feels wild, yet balanced.
Step 4: Build the Base
Start by clearing weeds and turf. Nothing ruins a rockery faster than bindweed or couch grass pushing through. Lay a foundation of rubble or coarse stones to improve drainage. This base is like the bones of your rockery—it keeps everything stable.
Add a layer of soil mixed with grit. Firm it down gently, but don’t compact it like you’re paving a road. Plants need room to root. Keep checking your slope—it should lean slightly, so rainwater runs off instead of pooling.
Step 5: Place the Rocks
Now comes the fun part. Place your largest rocks first. Sink about a third of each stone into the ground so it looks natural, not perched. Tilt them slightly backward, as if leaning into the slope. This trick not only looks authentic but also gives plants tiny pockets to settle in.
Work from big to small. Use medium stones to fill gaps and create ledges. Avoid patterns. If it looks “arranged,” step back, take a breath, and shuffle things around. Nature doesn’t do neat rows.
Step 6: Add the Soil Mix
Once your rocks are in place, fill the gaps with your soil mix. A good recipe is one part garden soil, one part sharp sand, and one part grit. Alpine roots like to breathe. If you’re planting special varieties like saxifrages or sempervivums, you can add a little crushed limestone for extra drainage.
Tamp the soil gently into crevices. Don’t overfill—you’ll need space to tuck in plants.
Step 7: Select Alpine Plants
This is where the Alpine Rockery comes alive. Choose plants that thrive in poor soil and sharp drainage. Some reliable stars include:
-
Saxifrages – tiny cushion plants with delicate blooms
-
Aubrieta – purple carpets of spring flowers
-
Sempervivum (Hens and Chicks) – hardy succulents that cling to rocks
-
Thyme – aromatic ground cover
-
Gentians – striking blue flowers that look like jewels
A tip? Don’t overcrowd at first. Alpine plants spread slowly, but once they settle, they’ll surprise you.
Step 8: Planting
Make small holes between rocks, pop the plants in, and firm them gently. Water lightly to settle the soil. Resist the urge to flood them—they don’t like sitting in wet feet.
I still remember the first time I planted saxifrages in my rockery. They looked so tiny and fragile, I thought the first storm would wash them away. A year later, they’d spread into a cheerful cushion of pink blooms. That’s the joy of patience in gardening.
Step 9: Mulch and Finishing Touches
Use fine gravel or grit as mulch. It keeps weeds down, protects roots, and looks natural. Sprinkle it lightly around plants, not burying them. Step back, take in your work, and adjust a rock here or there if something feels off.
You can also add decorative touches—like a weathered log, a small birdbath, or even a miniature path through the rocks. But don’t overdo it. The plants should be the stars.
Step 10: Ongoing Care
Alpine Rockeries don’t need much fuss, but they do need some love. Keep an eye on weeds. They sneak into crevices faster than you think. Water sparingly during dry spells—remember, these plants are used to tough conditions.
Every couple of years, you may need to refresh soil or replace a plant that fizzled out. That’s normal. Rockeries evolve. The joy is in watching how they change over time.
15 Best Alpine Plants for Your Rockery (With Care Tips)
1. Saxifraga (Rockfoil)
A true alpine classic. Forms cushions of tiny leaves topped with delicate flowers.
Care tip: Loves gritty soil and partial shade. Keep it away from waterlogged spots.
2. Sempervivum (Hens and Chicks)
Tough, hardy rosettes that multiply quickly. Great for filling gaps.
Care tip: Plant in shallow crevices. Needs almost no watering once established.
3. Aubrieta
A spring superstar with purple cascades of blooms.
Care tip: Best on a slope or edge where it can trail naturally.
4. Gentiana
Striking deep blue flowers that look like gems.
Care tip: Prefers moist but well-drained soil. Give it a cool spot.
5. Edelweiss (Leontopodium alpinum)
The mountain symbol itself. White star-shaped flowers with a velvety texture.
Care tip: Loves limestone-rich soil and full sun.
6. Campanula (Bellflower)
Spreads fast with cheerful bell-shaped flowers.
Care tip: Tuck into crevices for a natural look. Trim lightly after flowering.
7. Phlox subulata (Creeping Phlox)
A colorful ground cover that carpets rocks in pink, purple, or white.
Care tip: Plant at the front for maximum effect.
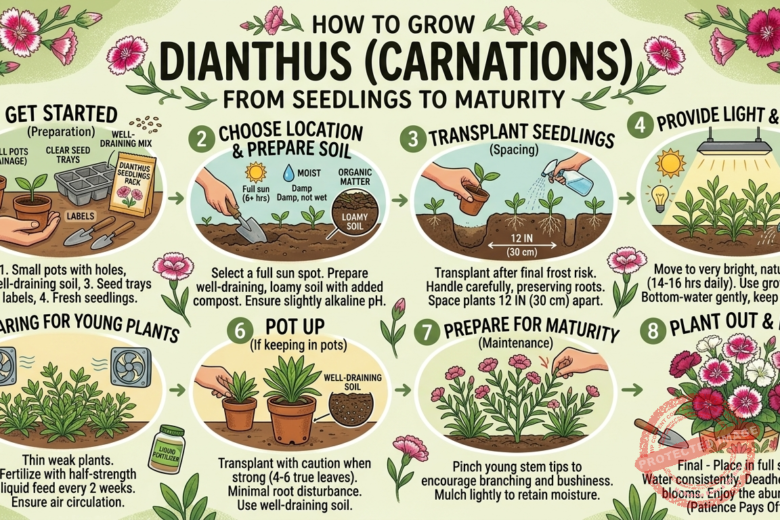
8. Dianthus (Alpine Pink)
Fragrant flowers with a splash of pink or red.
Care tip: Loves sun. Clip back after flowering to keep it neat.
9. Arabis (Rock Cress)
Low-growing and smothers rocks with tiny white blooms.
Care tip: Perfect for edging your rockery paths.
10. Thymus (Creeping Thyme)
Not just pretty, but edible and aromatic too.
Care tip: Plant between rocks where it can spread and release fragrance when brushed.
11. Erigeron karvinskianus (Mexican Daisy)
Produces tiny daisy-like flowers that change from white to pink.
Care tip: Self-seeds happily, so give it space.
12. Silene (Moss Campion)
Forms neat cushions with small starry flowers.
Care tip: Good for higher, exposed spots in your rockery.
13. Sedum (Stonecrop)
Succulent leaves and late-season flowers loved by pollinators.
Care tip: Thrives in dry, sunny places. Very low maintenance.
14. Primula (Primrose)
Bright blooms in spring, adding bursts of color.
Care tip: Prefers cooler, moist pockets of the rockery.
15. Alyssum (Basket-of-Gold)
Golden-yellow flowers that light up your garden in spring.
Care tip: Place near edges or slopes so the flowers cascade down naturally.
A Relatable Scenario
Last spring, I had a friend visit who had never seen my Alpine Rockery. She walked straight past my vegetable patch and beelined for the rocks. “Wow, it looks like something out of a mountain trail!” she said. That made my sore back from hauling rocks totally worth it. It reminded me that a rockery isn’t just for the gardener—it becomes a feature for everyone who steps into your garden.
FAQs About Alpine Rockeries
Q: Can I build an Alpine Rockery in a flat garden?
Yes, just build up a mound with soil and rocks to create levels. It doesn’t need a natural slope.
Q: Do Alpine Rockeries only suit big gardens?
Not at all. You can create a miniature version in a corner, or even in raised troughs if space is tight.
Q: What’s the best season to start?
Spring or autumn works best. The soil is workable, and plants have time to establish before extreme heat or cold.
Q: How do I stop weeds?
Start with a clean base, mulch with gravel, and stay on top of small intruders before they spread.
Q: Can I mix alpines with other plants?
Yes, but choose companions with similar needs. Low-maintenance herbs like thyme or small ornamental grasses can work well.
How-To Quick Checklist
-
Pick a sunny, well-drained spot.
-
Gather rocks, soil, grit, and tools.
-
Sketch your layout before digging.
-
Clear the area and lay a drainage base.
-
Place big rocks first, then medium, then small.
-
Fill with gritty soil mix.
-
Plant alpines sparingly, giving them room.
-
Mulch with gravel.
-
Water lightly and watch them grow.
-
Maintain with weeding and occasional refresh.
Closing Thoughts
Building an Alpine Rockery is more than a garden project—it’s a way of capturing the quiet drama of the mountains in your own space. It’s not about perfection but about creating a living, breathing corner that feels timeless. Every rock you place, every plant you tuck in, is part of a bigger story.
And here’s what I’ve learned: don’t rush it. Enjoy the process. The lifting, the arranging, the planting—it’s all part of the journey. Because one day, when your rockery is blooming with color and buzzing with life, you’ll sit back and think, “I built that.”
So, are you ready to roll up your sleeves and start building your Alpine Rockery this season?