Growing cherry tomatoes in a 5-gallon bucket is one of the easiest and most rewarding ways to enjoy fresh, homegrown tomatoes, even if you have limited garden space. Whether you have a small backyard, patio, balcony, or rooftop garden, a simple bucket can provide the perfect environment for producing a steady harvest of sweet and juicy cherry tomatoes.
Unlike larger tomato varieties that require extensive garden beds, cherry tomatoes adapt exceptionally well to container growing. With proper soil, watering, sunlight, and care, a single healthy plant can produce dozens of tomatoes throughout the growing season.
In this guide, you’ll learn how to plant cherry tomatoes in a 5-gallon bucket, the best soil mix to use, watering techniques, fertilization tips, and common mistakes to avoid.
Why Grow Cherry Tomatoes in a 5-Gallon Bucket?
Container gardening offers several advantages for tomato growers:
- Ideal for small spaces
- Easier weed control
- Better soil management
- Reduced soil-borne diseases
- Improved drainage
- Easy mobility when weather conditions change
A 5-gallon bucket provides enough root space for one cherry tomato plant while remaining easy to move and manage.
Materials You’ll Need
Before planting, gather the following supplies:
- One clean 5-gallon bucket
- Cherry tomato seedling or seeds
- Quality potting mix
- Compost or aged manure
- Drill for drainage holes
- Tomato cage or stake
- Organic fertilizer
- Watering can or garden hose
- Mulch (optional)
Choosing the Right Cherry Tomato Variety
While most cherry tomatoes grow well in containers, some varieties perform particularly well in buckets.
Recommended Varieties
- Sweet 100
- Sungold
- Tiny Tim
- Gardener’s Delight
- Black Cherry
- Super Sweet 100
- Yellow Pear
Determinate and dwarf varieties are often easier to manage in containers because they remain relatively compact.

Preparing the 5-Gallon Bucket
Proper bucket preparation is critical for healthy root growth.
Step 1: Drill Drainage Holes
Tomatoes dislike waterlogged soil.
Using a drill, make:
- 6–10 holes at the bottom
- A few holes around the lower sides
Good drainage helps prevent root rot and fungal diseases.
Step 2: Clean the Bucket
If the bucket was previously used for chemicals or paints, avoid using it for growing food.
Wash thoroughly with:
- Warm water
- Mild soap
Rinse completely before use.
Choosing the Best Soil Mix
Garden soil alone is usually too heavy for containers.
A good tomato container mix should contain:
- 60% quality potting soil
- 30% compost
- 10% perlite or coarse sand
This combination provides:
- Excellent drainage
- Good moisture retention
- Strong nutrient availability
The soil should feel light and crumbly rather than compacted.
How to Plant Cherry Tomatoes
Step 1: Fill the Bucket
Fill the container approximately three-quarters full with prepared potting mix.
Leave a few inches at the top for watering.
Step 2: Remove Lower Leaves
Before planting, remove leaves from the bottom portion of the seedling stem.
Tomatoes can develop roots along buried stems, creating a stronger root system.
Step 3: Plant Deeply
Place the seedling deep into the soil.
Bury about two-thirds of the stem, leaving only the upper leaves exposed.
This encourages:
- More roots
- Better stability
- Increased nutrient uptake
Step 4: Water Thoroughly
Immediately after planting:
- Water slowly
- Ensure moisture reaches the entire root zone
- Allow excess water to drain
Positioning Your Bucket
Cherry tomatoes need plenty of sunlight.
Place the bucket where it receives:
- At least 6–8 hours of direct sunlight daily
- Good airflow
For maximum fruit production, 8–10 hours of sunlight is ideal.

Supporting the Plant
Although cherry tomatoes produce smaller fruits, many varieties become surprisingly heavy.
Install support early.
Options Include
- Tomato cages
- Wooden stakes
- Bamboo poles
- Trellis systems
Adding support at planting time prevents root disturbance later.
Watering Tips for Container Tomatoes
Container-grown tomatoes dry out faster than garden-grown plants.
Watering Guidelines
- Check soil daily
- Water when the top inch feels dry
- Water deeply rather than lightly
- Avoid wetting leaves when possible
During hot weather, watering may be necessary once or even twice daily.
Signs of underwatering include:
- Wilting leaves
- Dry soil
- Blossom drop
Signs of overwatering include:
- Yellow leaves
- Soft stems
- Root rot
Fertilizing Cherry Tomatoes
Tomatoes are heavy feeders.
At Planting
Mix into the soil:
- Compost
- Well-rotted manure
- Organic tomato fertilizer
During Growth
Feed every 2–3 weeks with:
- Tomato fertilizer
- Fish emulsion
- Compost tea
Once flowering begins, use fertilizers slightly higher in phosphorus and potassium to encourage fruit production.
Mulching the Soil Surface
Adding mulch helps:
- Retain moisture
- Reduce soil temperature fluctuations
- Prevent rapid drying
Suitable mulches include:
- Straw
- Dried grass clippings
- Shredded leaves
Apply a 1–2 inch layer around the base of the plant.
Common Problems and Solutions
Blossom End Rot
Symptoms:
- Black spots on fruit bottoms
Causes:
- Irregular watering
- Calcium deficiency
Solution:
- Maintain consistent moisture
- Add calcium-rich amendments if needed
Yellow Leaves
Possible causes:
- Overwatering
- Nutrient deficiencies
- Poor drainage
Cracked Tomatoes
Caused by:
- Sudden heavy watering after drought stress
Maintain even watering schedules.
Pest Issues
Watch for:
- Aphids
- Whiteflies
- Tomato hornworms
Control methods include:
- Hand removal
- Neem oil sprays
- Insecticidal soap
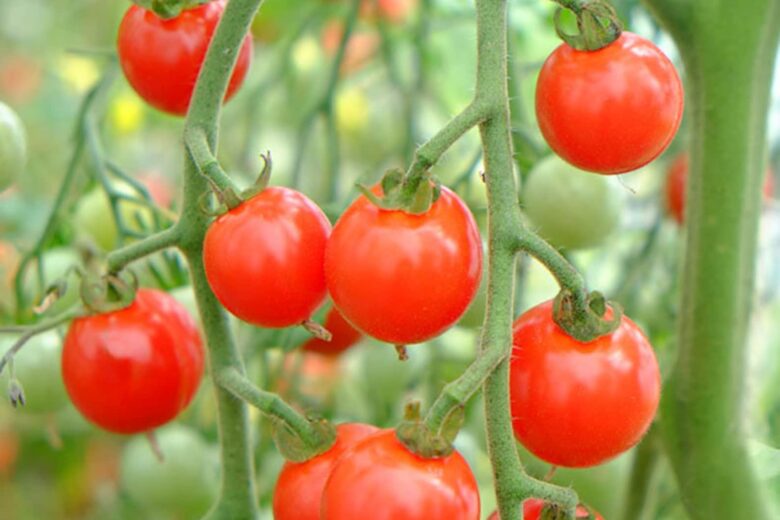
Harvesting Cherry Tomatoes
Most cherry tomatoes mature 60–80 days after transplanting.
Harvest fruits when:
- Fully colored
- Slightly firm
- Easily detached from the vine
Regular harvesting encourages continued fruit production.
Tips for Bigger Harvests
To maximize production:
- Use a quality potting mix
- Provide 8+ hours of sunlight
- Water consistently
- Fertilize regularly
- Remove damaged leaves
- Harvest frequently
- Support plants properly
Healthy cherry tomato plants grown in 5-gallon buckets can produce hundreds of fruits during a growing season.
Final Thoughts
Planting cherry tomatoes in a 5-gallon bucket is a practical and highly productive gardening method for both beginners and experienced gardeners. With proper drainage, nutrient-rich soil, adequate sunlight, and regular watering, you can enjoy a continuous supply of delicious cherry tomatoes right from your patio, balcony, or backyard.
A single bucket may seem simple, but with the right care, it can become a thriving mini tomato garden that produces fresh harvests for months. Whether you’re growing food to save money, improve your diet, or simply enjoy gardening, cherry tomatoes are among the best crops to grow in containers.