Are you looking to learn how to make fertilizer for your plants? In this guide, we will walk you through the process of creating your own plant fertilizer. By making your own fertilizer, you have control over the ingredients and can ensure it suits the specific needs of your plants.
To create homemade fertilizer for plants, you can utilize organic materials such as compost, kitchen scraps, and animal manure, which provide essential nutrients. These ingredients can be mixed together and applied to the soil or plants to enrich their nutrient content and support healthy growth.
Whether you have a vegetable garden, flower beds, or potted plants, making your own fertilizer can be a cost-effective and sustainable solution. Get ready to discover simple methods and ingredients that will help nourish your plants and promote their healthy growth.
Let’s dive into the world of DIY plant fertilizers and unlock the secrets to greener thumbs.
How To Make Fertilizer For Plants
So, you’re eager to learn how to make fertilizer for your plants, huh? Well, you’ve come to the right place!
Crafting your own fertilizer is not only cost-effective but also allows you to customize the nutrients to meet your plants’ specific needs.
We will discuss the step on how to make fertilizer for plants, typically how to make natural (compost) fertilizer, and chemical fertilizer.
Here’s the step-by-step instruction on how to make Natural (compost) fertilizer for plants:
Step 1: Gather Your Ingredients
To make your own fertilizer, you’ll need a few key ingredients. Collect kitchen scraps such as vegetable peels, fruit scraps, and tea bags.
Save your coffee grounds after brewing a fresh cup of coffee. Don’t forget to save your eggshells too! Dry leaves or grass clippings from your yard can also be used.
If you have access to manure, it can be an additional nutrient source for your fertilizer. Lastly, keep some water handy for the process.
Read Also: [Beginners Guide] When to Apply Fertilizer to Vegetable
Step 2: Prepare a Compost Bin or Pile
Choose a suitable location in your garden or yard for your compost bin or pile. Ideally, it should be an area that receives some sunlight and is easily accessible.
Begin by creating a base layer of dry leaves or grass clippings to allow for proper airflow.
Step 3: Maintain the Compost
Layer your kitchen scraps, coffee grounds, eggshells, and manure (if using) on top of the base layer.
Make sure to alternate between green materials (kitchen scraps, coffee grounds) and brown materials (dry leaves, grass clippings) to maintain a balanced compost. Keep the pile moist but not saturated by watering it regularly.
Step 4: Monitor the Composting Process
Over time, the organic materials will break down and decompose. It’s important to periodically turn the compost to aerate it and facilitate the decomposition process.
Use a garden fork or shovel to mix the materials, ensuring that the outer materials are brought to the center. This helps speed up decomposition and prevents any unpleasant odors.
Step 5: Test the Compost Maturity
After a few weeks to months, depending on the conditions, your compost will mature. It should have a crumbly texture and an earthy smell.
This indicates that it’s ready to be used as fertilizer. If the compost still has recognizable materials or a strong odor, allow it to continue decomposing.
Step 6: Prepare the Fertilizer
To create a nutrient-rich planting mix, mix the mature compost with soil. Use a ratio of approximately 1 part compost to 3 parts soil.
Thoroughly blend the compost and soil together to ensure an even distribution of nutrients. Alternatively, you can make a liquid fertilizer by diluting the compost with water.
Use a ratio of about 1 part compost to 5 parts water. Allow the mixture to steep for a few days, stirring occasionally.
Step 7: Apply the Fertilizer
Incorporate the compost and soil mixture around the root zone of your plants. Ensure that the fertilizer is well-mixed with the existing soil.
When using the liquid fertilizer, water your plants with it regularly, following the recommended dilution ratios.
Monitor the health and growth of your plants, and adjust the frequency of fertilizer application as needed.
Here’s a step-by-step guide on how to make chemical fertilizer for plants, tailored for beginners like you:
Step 1: Gather Your Ingredients
To make chemical fertilizer, you’ll need the following ingredients:
- Nitrogen source (ammonium nitrate, urea, or ammonium sulfate)
- Phosphorus source (superphosphate or triple superphosphate)
- Potassium source (potassium chloride or potassium sulfate)
- Micronutrients (optional) like iron, manganese, zinc, or copper, available as chelated forms
Step 2: Calculate the Ratio
Determine the desired nutrient ratio based on your plant’s needs. The ratio is usually represented by three numbers, such as N-P-K (nitrogen-phosphorus-potassium).
Research the specific requirements for your plants to determine the appropriate ratio.
Step 3: Measure and Mix the Ingredients
Wearing appropriate safety gear like gloves and goggles, carefully measure the desired amounts of each ingredient based on the ratio you calculated.
Use a digital scale for accuracy. Thoroughly mix the ingredients together in a well-ventilated area, ensuring they are evenly blended.
Step 4: Store and Label
Transfer the homemade chemical fertilizer into a clean, airtight container. Label the container with the nutrient ratio, ingredients used, and date of preparation. Store the fertilizer in a cool, dry place away from children and pets.
Step 5: Application
Before applying chemical fertilizer, water your plants thoroughly to prepare the soil.
Follow the instructions provided by the manufacturer or use general guidelines for application rates based on your plants’ requirements.
Apply the fertilizer evenly around the plants, taking care not to exceed the recommended dosage. Avoid direct contact with plant foliage to prevent burning.
Step 6: Watering and Monitoring
After applying the fertilizer, water the plants to help the nutrients penetrate the soil and reach the root zone.
Monitor the plants closely for any signs of nutrient deficiencies or excesses. Adjust the fertilizer application accordingly if necessary.
Step 7: Safety Precautions
Chemical fertilizers can be potentially hazardous if mishandled. Always follow safety guidelines provided by the manufacturer, such as wearing protective gear, storing the fertilizer securely, and keeping it out of reach of children and pets. Dispose of any unused or expired fertilizer properly, following local regulations.
Benefits of Making Fertilizer for Plants
- Cost-effective: Making your own fertilizer can save you money compared to purchasing commercial fertilizers.
- Customization: By making your own fertilizer, you have control over the nutrient composition, allowing you to tailor it to meet the specific needs of your plants.
- Environmentally friendly: Homemade fertilizers often utilize organic materials, reducing the reliance on synthetic chemicals and minimizing environmental impact.
- Recycling and waste reduction: Making fertilizer allows you to repurpose kitchen scraps, yard waste, and other organic materials that would otherwise end up in the landfill.
- Soil enrichment: Homemade fertilizers can improve soil structure, increase organic matter content, and enhance nutrient availability, promoting healthier plant growth.
Challenges of Making Fertilizer for Plants
- Knowledge and expertise: Understanding the nutrient requirements of different plants and ensuring a balanced fertilizer formulation can be a learning process.
- Time-consuming: Making fertilizer requires patience as it involves the decomposition and maturation of organic materials, which can take weeks to months.
- Odor and pest management: Composting organic materials can produce odors and attract pests, requiring proper management and maintenance.
Where to Source for Ingredients to make Fertilizer
- Kitchen scraps: Collect vegetable and fruit scraps, coffee grounds, and eggshells from your own kitchen.
- Yard waste: Utilize dry leaves, grass clippings, and plant trimmings from your garden.
- Manure: Consider sourcing well-aged manure from local farms or livestock owners.
- Micronutrients: Chelated forms of micronutrients can be purchased from garden centers or online retailers.
Factors to Consider when making Fertilizer
- Nutrient requirements: Understand the specific nutrient needs of your plants to determine the appropriate ratios of nitrogen (N), phosphorus (P), and potassium (K), as well as micronutrients.
- Soil analysis: Conduct a soil test to assess the existing nutrient levels and pH of your soil. This will help you adjust your homemade fertilizer formulation accordingly.
- Composting process: Proper maintenance of the compost pile or bin, including turning the materials and maintaining the right moisture levels, is crucial for successful decomposition.
Where to Sell Fertilizer
- Local garden centers: Approach garden centers or nurseries in your area to inquire about selling your homemade fertilizer.
- Farmers markets: Consider participating in local farmers markets, where you can showcase and sell your homemade fertilizers to gardening enthusiasts.
- Online platforms: Utilize online marketplaces or establish your own website to reach a broader customer base interested in organic or homemade fertilizers.
- Community networks: Spread the word within your community through gardening clubs, social media groups, or local gardening events to connect with potential buyers.
How To Make Fertilizer For Plants Naturally
When it comes to nourishing your plants naturally, there are several options available. One method is creating compost, a nutrient-rich organic material made from decomposed kitchen scraps, yard waste, and other organic matter.
Compost can be applied directly to the soil or used to make compost tea, a liquid fertilizer. Another natural fertilizer option is making use of animal manure, which is high in nutrients.
Manure can be composted or diluted with water to create a nutrient-rich solution for your plants.
Using organic materials like seaweed, bone meal, and coffee grounds can provide beneficial nutrients to your plants naturally.
How to make Organic Fertilizer
Organic fertilizers are derived from natural sources and are free from synthetic chemicals. To make organic fertilizer, you can create a compost pile using kitchen scraps, yard waste, and plant materials.
Allow the organic matter to decompose over time, and you will have nutrient-rich compost to enrich your soil.
Another option is utilizing organic materials like animal manure, fish emulsion, or seaweed to create organic fertilizers.
These materials can be mixed with water or added directly to the soil to provide essential nutrients to your plants in an organic and sustainable way.
How to Make Fertilizer For Plants At Home
Creating your own plant fertilizer at home is simple and cost-effective. One method is making compost using kitchen scraps, leaves, and other organic matter.
This compost can be mixed into the soil or used as a top dressing around your plants.
Another approach is making a homemade liquid fertilizer by steeping compost or organic materials in water.
This liquid fertilizer can be applied directly to the plants’ roots or used as a foliar spray. You can collect and utilize natural resources such as rainwater or kitchen wastewater to water your plants, providing them with some essential nutrients.
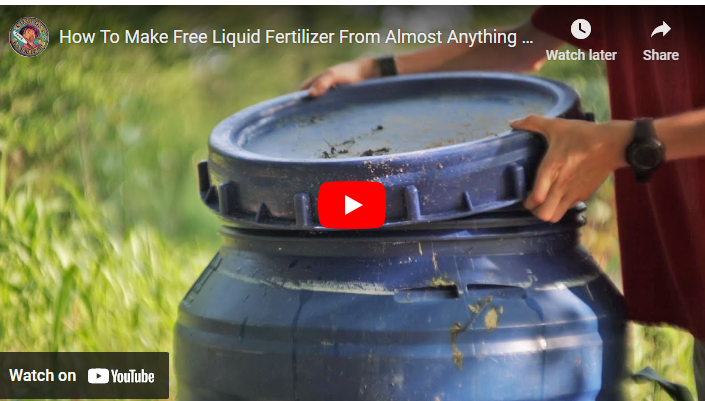
Homemade Liquid Fertilizer
Homemade liquid fertilizers can be a convenient way to provide nutrients to your plants.
To make a liquid fertilizer, you can create compost tea by steeping compost or vermicompost (worm compost) in water for a few days.
Strain the liquid, and it will be rich in nutrients ready to be applied to your plants.
Another option is to use diluted organic materials like fish emulsion, seaweed extract, or diluted manure tea.
These homemade liquid fertilizers can be applied to the soil around the plants’ roots or sprayed directly onto the foliage.
Homemade Fertilizer for Potted Plants
Potted plants often require regular fertilization to thrive. One way to make homemade fertilizer for potted plants is to mix compost or vermicompost into the potting soil.
This will provide slow-release nutrients to the plants over time. Another option is using diluted liquid fertilizers such as compost tea or diluted organic liquid fertilizers.
Be cautious not to over-fertilize potted plants, as it can lead to nutrient imbalances or root damage.
Always follow the recommended dosage and monitor the plants’ response to ensure healthy growth.
What Is the Best Homemade Fertilizer For Plants
The best homemade fertilizer for plants can vary depending on the specific needs of your plants and the nutrients they require.
Compost is often considered one of the best all-around fertilizers, as it improves soil structure and provides a wide range of nutrients.
Compost tea made from steeping compost in water can provide a nutrient-rich liquid fertilizer.
For specific nutrient requirements, organic materials like fish emulsion (high in nitrogen), bone meal (rich in phosphorus), or wood ash (a source of potassium) can be used.
Experimentation and observing your plants’ response will help determine the best homemade fertilizer for your specific plants.
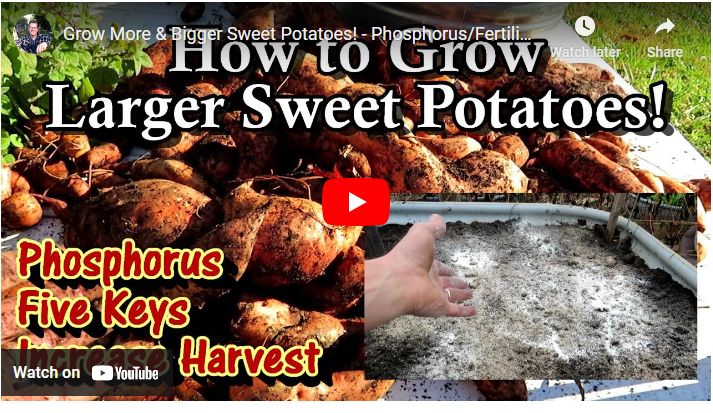
Homemade Fertilizer For Vegetables
Vegetable plants benefit from nutrient-rich soil to produce abundant and healthy harvests.
Homemade fertilizers can provide the necessary nutrients for vegetable growth. Compost is a valuable option, as it enriches the soil with organic matter and essential nutrients.
Mixing compost into the soil before planting or applying it as a side dressing during the growing season can promote vegetable growth.
Organic liquid fertilizers such as diluted seaweed extract or diluted fish emulsion can be used to supplement the nutrient needs of vegetable plants.
Ensure to follow the recommended application rates and adjust based on your plants’ requirements.
Homemade Fertilizer for Plants Growing In Water
Plants growing in water, such as hydroponic or aquaponic systems, also require proper nutrition.
Homemade fertilizers for these systems can be achieved by utilizing organic liquid nutrients specially formulated for hydroponic or aquaponic setups.
These liquid fertilizers contain the necessary nutrients in balanced ratios to support plant growth in water-based environments.
You can create organic nutrient solutions by steeping organic materials such as compost, worm castings, or seaweed in water and using the resulting liquid as a nutrient solution for the plants.
Regular monitoring of nutrient levels and adjusting the solution accordingly is essential for the health of water-grown plants.
Conclusion
With this simple guide, you can now harness the power of homemade fertilizer to nourish your plants. By repurposing organic waste and creating nutrient-rich compost, you’ll promote healthier growth and greener surroundings. So roll up your sleeves, get creative, and watch your garden flourish like never before!


