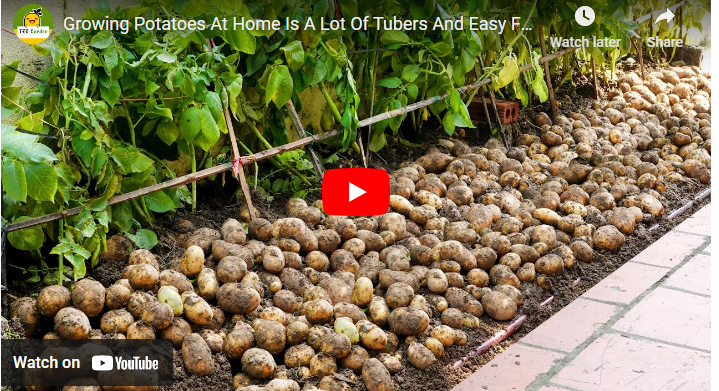
Potatoes are one of the most widely grown root crops around the world, prized for their versatility in the kitchen and their adaptability in various growing environments. Whether you are a seasoned gardener or a beginner looking to enjoy a harvest, knowing when to dig up your potatoes is crucial for ensuring that they reach their full potential in both flavor and size. Timing your potato harvest correctly can be the difference between perfectly mature, storable potatoes and those that are either underdeveloped or overripe and prone to spoilage. Learning to recognize the signs that your potatoes are ready is a skill that can vastly improve your gardening success.
One of the most common challenges potato growers face is knowing exactly when to harvest. Because potatoes grow underground, it’s easy to assume they are ready to be dug up when the plants above ground start to yellow or die off. However, there is more to it than that. Factors such as the variety of potato, soil conditions, and weather patterns can all influence the right time for harvesting. If you pull them too early, you may end up with small, undeveloped tubers. On the other hand, leaving them in the ground too long can expose them to pests, diseases, and excessive moisture that can lead to rot.
This step-by-step guide will walk you through the essential indicators for determining when your potatoes are ready for harvest. By the end of this guide, you’ll have a clear understanding of what to look for above and below the ground, ensuring you get the best possible crop from your potato plants. Let’s explore the key signs that signal your potatoes are mature and ready to be harvested.
Growth Cycle of Potatoes
Understanding the growth cycle of potatoes is an important first step toward knowing when your crop is ready to be harvested. Potatoes generally take between 70 and 120 days to mature, depending on the variety, growing conditions, and the climate. This growth cycle can be broken down into several stages:
- Sprouting and Vegetative Growth: After planting seed potatoes, the first phase of growth is vegetative. This is when the shoots emerge from the soil, and the plant begins to develop leaves and stems. During this time, the plant is focused on building a strong, healthy top to support tuber production underground.
- Tuber Formation: About 30 to 60 days after planting, the plant begins forming tubers underground. You won’t see the tubers during this stage, but you may notice the plant’s growth slowing down slightly as more energy is directed to developing the potatoes.
- Flowering: Most potato plants produce flowers during the middle of their growth cycle. This is a good indication that tubers are starting to grow. While not all varieties flower, when you do see blooms, it’s a sign that your potatoes are beginning to mature.
- Maturation: After the flowering stage, the plant will begin to yellow and die back. This is a sign that the potato plants are reaching the end of their life cycle, and the tubers are close to being ready for harvest.
Knowing the variety of potatoes you’re growing will help you estimate when they should be ready. Early varieties, such as ‘Yukon Gold,’ mature faster than late-season varieties like ‘Russet Burbank.’ Checking seed packets or consulting local growing guides can give you a rough timeline for your harvest window.
Signs Your Potatoes Are Ready for Harvest
Several key indicators can tell you when your potatoes are ready to be harvested. While the timing may vary based on variety and growing conditions, the following signs are universal markers of maturity.
1. The Plant’s Foliage Starts to Die Back
The most obvious sign that your potatoes are approaching maturity is when the leaves and stems start to yellow, wilt, and die back. This usually occurs about two weeks after flowering, depending on the variety. Once the foliage has died back completely, the tubers have stopped growing, and the skins are beginning to toughen. This is the ideal time to harvest if you are looking to store the potatoes for longer periods.
It’s essential to let the foliage die back naturally. Cutting the plants down prematurely can cause the tubers to stop growing, and their skins may not toughen up, leading to a shorter shelf life. Patience during this phase is key.
2. Check the Skin Toughness
Another crucial indicator of potato maturity is the toughness of the skin. Gently rub a potato from your plant between your fingers. If the skin easily rubs off, the potato isn’t fully mature yet. Mature potatoes will have firm skins that do not peel off when rubbed. This tougher skin helps the potatoes store better, as it protects them from damage, moisture loss, and disease. Immature potatoes, also called “new potatoes,” are harvested earlier and have a much thinner skin, making them more delicate and ideal for immediate use rather than storage.
3. Time of Year and Growth Duration
The time of year and the length of time your potatoes have been growing are also important factors. Potatoes planted in early spring can typically be harvested in late summer or early fall. Count the days since you planted the seed potatoes and compare this to the maturity window for the variety you are growing. Early varieties mature faster, in about 70 to 90 days, while main crop or late-season varieties can take up to 120 days. Keeping track of these timeframes will give you a general idea of when your harvest window is approaching.
4. Testing with a Small Sample
If you’re unsure whether your potatoes are ready for harvest, you can always test by digging up a few tubers from one plant. Use a garden fork to gently lift the plant, being careful not to damage the tubers. Inspect the potatoes for size, skin toughness, and overall condition. If they look fully formed and the skins are firm, you can start harvesting the rest of your crop. If they still seem small or the skins peel off easily, give them another week or two before checking again.
Other Areas That Relate to This Topic
Early Harvest vs. Late Harvest
Deciding when to harvest your potatoes also depends on how you intend to use them. If you prefer “new potatoes” for fresh eating, you can harvest them earlier when the skins are still thin and tender. These potatoes have a wonderful flavor and are perfect for roasting or boiling but should be consumed within a week or two, as they don’t store well. On the other hand, if you’re looking to store your potatoes for winter use, waiting until the foliage dies back and the skins toughen is essential.
Late-season harvesting, especially after the plants have fully died back, ensures that the potatoes are more mature with thick skins. These are ideal for long-term storage in a cool, dark place. You can extend their life by leaving them in the ground for a couple of extra weeks after the foliage has died back, as long as the weather remains dry. This allows the skins to toughen even further, improving their storage potential.
Soil Conditions and Their Role in Potato Maturity
The condition of your soil can significantly impact the maturity of your potatoes. Well-drained, loose soil helps potatoes grow evenly and develop tougher skins. On the other hand, if your soil is heavy, compacted, or prone to waterlogging, your potatoes may be smaller, have thinner skins, or be prone to rot. Regularly check the moisture levels of your soil during the growing season and avoid overwatering as harvest time approaches. Letting the soil dry out slightly before harvest helps toughen the potato skins and makes digging them up easier.
If you live in a region with heavy rainfall or poor drainage, consider planting your potatoes in raised beds or mounded rows to improve drainage. This can reduce the risk of waterlogged soils and help ensure that your potatoes reach full maturity.
The Importance of Curing Potatoes After Harvest
Once you’ve dug up your potatoes, it’s essential to cure them before long-term storage. Curing is the process of allowing the potatoes to sit in a warm, well-ventilated area for about 10 to 14 days after harvesting. This process helps any minor nicks or cuts on the potatoes heal and allows the skins to toughen even more, which improves their storage life.
To cure your potatoes, lay them out in a single layer in a cool, dry place out of direct sunlight. A temperature of around 60°F to 65°F (15°C to 18°C) with moderate humidity is ideal. After curing, move the potatoes to a cool, dark place with temperatures around 40°F to 45°F (4°C to 7°C) for long-term storage. Avoid storing them near apples or onions, as the gases released by these produce items can cause the potatoes to spoil more quickly.
Common Potato Harvesting Mistakes
Even experienced gardeners can make mistakes when harvesting potatoes. One common error is digging up potatoes too early before they have had a chance to mature fully. This can result in small, underdeveloped tubers that won’t store well and won’t provide the yield you’re hoping for. Another mistake is leaving the potatoes in the ground for too long, especially in wet conditions. Excessive moisture can cause the potatoes to rot or become infested with pests such as wireworms or slugs.
Another issue to watch out for is damaging the potatoes while digging them up. Using a garden fork can help minimize damage, but be sure to dig wide and deep around the plant to avoid piercing the tubers. Damaged potatoes are more likely to rot in storage and should be used up quickly.
Conclusion
Harvesting potatoes is both an art and a science, requiring careful observation of the plants, attention to the growing conditions, and timing. By understanding the life cycle of your potato plants, looking for key signs such as the dieback of foliage and the toughness of the skin, and testing with a sample dig, you can confidently determine when your potatoes are ready for harvest. Whether you’re growing early, mid-season, or late varieties, these steps will help you enjoy a bountiful and delicious crop, perfect for fresh eating or long-term storage. By curing your potatoes properly and avoiding common harvesting mistakes, you’ll ensure that your potatoes remain healthy and flavorful for months to come.