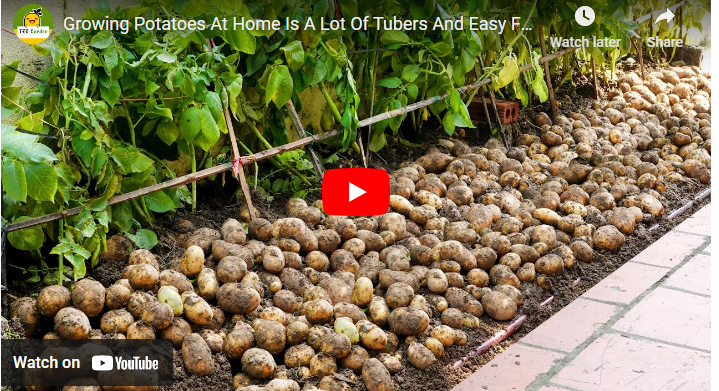
Are you eager to dig into the world of gardening and cultivate your own delicious potatoes? Look no further! In this step-by-step guide, we will unveil the secrets of growing potatoes successfully.
Whether you have a spacious backyard or a small balcony, you can embark on this exciting journey and witness the magic of these versatile tubers. So, grab your gardening gloves and let’s get started!
Potatoes, those beloved underground treasures, can be grown by anyone with a green thumb and a bit of patience. In this step-by-step guide, we’ll break down the potato-growing process into manageable stages, ensuring you have all the knowledge you need to cultivate your own bountiful harvest. So, let’s dive in!
How to Grow Potatoes Step by Step Guide
Growing potatoes involves a series of steps that demand careful attention and nurturing. By following this comprehensive guide, you’ll be equipped with the knowledge necessary to embark on your potato-growing journey.
Read Also: [Beginners guide] How to Grow Sweet Peppers
Step 1: Selecting the Right Seed Potatoes
Before you can start growing potatoes, you need to choose the right seed potatoes. These are the tubers you will plant to kick-start your potato patch. Here’s what you should consider when selecting your seed potatoes:
- Look for certified seed potatoes from reputable suppliers.
- Choose disease-free and well-sized potatoes.
- Opt for varieties suited to your local climate and soil conditions.
Read Also: [Practical Guide] How To Grow Okra From Seed To Harvest
Step 2: Preparing the Soil
Potatoes thrive in loose, well-draining soil with a pH level between 5.5 and 6.5. Here’s how to prepare your soil for optimal potato growth:
- Remove any weeds or rocks from the planting area.
- Loosen the soil using a garden fork or tiller.
- Amend the soil with organic matter, such as compost or well-rotted manure, to improve its fertility and structure.
Read Also: [Beginners Guide] How To Grow Vanilla Orchid At Home
Step 3: Chitting the Seed Potatoes
Chitting is the process of encouraging seed potatoes to sprout before planting. While not necessary, chitting can give your potatoes a head start. Here’s how to do it:
- Place your seed potatoes in a cool, well-lit area, such as a windowsill.
- Allow them to sprout, ensuring the sprouts are short and stubby.
- This process typically takes around 4 to 6 weeks.
Read Also: [Beginners Guide] How To Grow Spinach In Pots
Step 4: Cutting and Curing the Seed Potatoes
Cutting your seed potatoes into smaller pieces can help maximize your harvest. Here’s what you need to do:
- Use a clean, sharp knife to cut your seed potatoes into chunks, making sure each piece has at least two or three sprouts.
- Allow the cut surfaces to dry and callus over by leaving them exposed to the air for a couple of days.
Read Also: [Beginners Guide] How to Grow Almond Tree from Seed
Step 5: Planting the Seed Potatoes
Now it’s time to get your hands dirty and plant those sprouted seed potatoes. Here’s how to go about it:
- Dig trenches in your prepared soil, spacing them around 2 to 3 feet apart.
- Place the seed potatoes, cut side down, into the trenches, spacing them about 12 to 15 inches apart.
- Cover the seed potatoes with about 3 to 4 inches of soil.
Read Also: [Beginners Guide] How To Grow Aloe Vera
Step 6: Providing Proper Care
Once your potatoes are planted, they require proper care to ensure healthy growth and development.
Watering: Potatoes need consistent moisture to thrive. Water the plants regularly, aiming for about 1 to 2 inches of water per week. Be mindful not to overwater, as this can lead to rotting.
Fertilizing: To promote healthy growth, feed your potato plants with a balanced fertilizer that is rich in potassium and phosphorus. Apply the fertilizer according to the package instructions, usually a few weeks after planting and again when the plants begin to flower.
Read Also: [Beginners Guide] How To Grow Ceylon Cinnamon
Hilling: As the potato plants grow, they will start to produce stems and leaves above the soil surface. To protect the developing tubers and encourage more potato growth, gently mound soil around the base of the plants, creating small hills.
Weeding: Keep the potato patch free from weeds, as they can compete with the plants for nutrients and water. Regularly remove any weeds that emerge around the potato plants.
Read Also: [Beginners Guide] How to Grow Garlic: Complete Handle book
Pest and Disease Management: Monitor your potato plants for common pests such as potato beetles and aphids. If an infestation occurs, take appropriate measures like handpicking or using organic pest control methods. Additionally, be vigilant for signs of diseases such as blight or scab, and promptly address any issues to prevent spreading.
Read Also: [Beginners Guide] How To Grow Badam From Seed
Mulching: Applying a layer of organic mulch around the potato plants helps retain soil moisture, suppresses weed growth, and regulates soil temperature. Use materials like straw, shredded leaves, or grass clippings as mulch.
Supporting: As the potato plants grow taller, they may benefit from some support. Gently tie the stems to stakes or a trellis to prevent them from falling over and to maximize space utilization.
Read Also: [Beginners Guide] How To Grow Cinnamon Basil
Monitoring and Maintenance: Regularly check your potato plants for any signs of stress, nutrient deficiencies, or pests. Address any issues promptly to ensure the health and productivity of your crop.
Harvesting: Once your potato plants have completed their growth cycle, it’s time to harvest the tubers. Wait until the foliage has yellowed and died back, then carefully dig up the potatoes using a garden fork or shovel. Handle them with care to avoid damaging the skin or bruising.
Read Also: How To Grow Tomatoes In Grow Bag [Expert Tips]
Curing and Storage: After harvesting, allow the potatoes to dry and cure in a cool, dark, and well-ventilated space for about two weeks. Once cured, store your potatoes in a cool, dry area away from direct sunlight to prevent sprouting and prolong their shelf life.
How long does it take to grow potatoes?
The time it takes to grow potatoes can vary depending on the variety and growing conditions. On average, it takes around 80 to 100 days from planting to harvest.
Read Also: [Beginners Guide] How To Grow Cinnamon Indoor
Can I grow potatoes in containers or pots?
Yes, you can grow potatoes in containers or pots as long as they provide enough depth for root development. Choose a large container and follow the same planting and care instructions.
Do potatoes need full sun to grow?
While potatoes prefer full sun, they can tolerate partial shade. Aim for at least six hours of direct sunlight per day for optimal growth.
Read Also: [Beginners Guide] How To Grow Eastern Red Cedar
How do I know when potatoes are ready to harvest?
Potatoes are ready to harvest when the plants have died back, and the skins of the tubers are firm. You can gently dig up a few potatoes to check their size and maturity before harvesting the entire crop.
Read Also: [Beginners Guide] How To Grow Curry Leaves in the US
Can I save potatoes from this year’s harvest to plant next year?
While it’s possible to save potatoes from your harvest for planting the following year, it’s important to note that not all potato varieties are suitable for this purpose. Some varieties may not produce viable seeds, and others may be prone to diseases. It’s generally recommended to purchase certified seed potatoes for optimal results.
Read Also: [Beginners guide] How to Successfully Grow Palm Trees from Seeds
Can I grow potatoes from store-bought potatoes?
Yes, it is possible to grow potatoes from store-bought ones, but it’s important to choose organic potatoes to avoid the potential presence of growth inhibitors. Keep in mind that store-bought potatoes are often treated to prevent sprouting, so there is a chance they may not produce as well as certified seed potatoes.
Read Also: How to Grow Ginger [Complete Growing Manual]
How do I prevent potato diseases and pests?
To prevent potato diseases and pests, practice crop rotation by avoiding planting potatoes in the same spot for consecutive years. This helps disrupt the life cycles of pests and reduces the risk of soil-borne diseases. Also, ensure proper soil drainage, provide good air circulation around the plants, and promptly remove any affected foliage or plants to prevent the spread of diseases.
Can I grow potatoes in raised beds?
Yes, growing potatoes in raised beds can be an effective method. It allows better control over soil quality and drainage. Ensure the raised bed is deep enough to accommodate the potato tubers and follow the same planting and care guidelines.
Read Also: [Beginners Guide] How To Grow Onions: Complete Handbook
Are there different potato varieties to choose from?
Yes, there is a wide range of potato varieties available, each with its own unique characteristics. Some varieties are better suited for baking, while others are ideal for mashing or frying. Consider factors such as taste, texture, and cooking requirements when selecting potato varieties for your garden.
Conclusion
Congratulations! You’ve reached the end of our comprehensive step-by-step guide on how to grow potatoes. By following these guidelines and providing proper care, you’ll soon be rewarded with a bountiful harvest of delicious, homegrown potatoes.
Remember to choose the right seed potatoes, prepare the soil, and provide adequate watering, fertilizing, and pest management. With a little patience and nurturing, you’ll be enjoying the fruits (or rather, tubers) of your labor in no time.
So, what are you waiting for? Get your gardening gloves on, grab some seed potatoes, and start your potato-growing adventure today!

