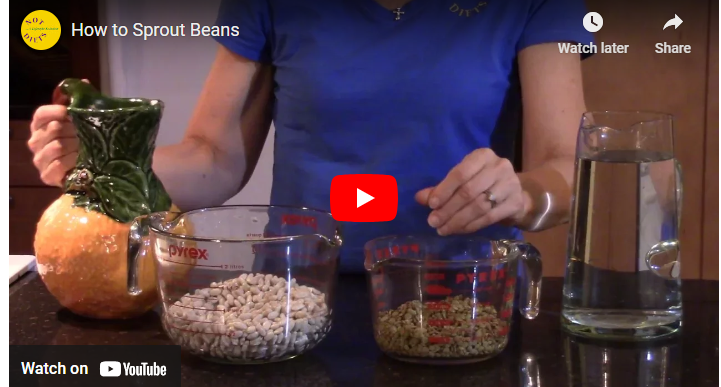
Sprouting beans is a simple and rewarding process that allows you to unlock the nutritional potential of legumes. Not only does sprouting increase the nutrient content of beans, but it also enhances their digestibility.
To sprout beans, rinse them thoroughly and soak them in water overnight or for about 8-12 hours. Drain the water, place the beans in a container or sprouting tray, and rinse them twice a day until they sprout, which usually takes around 2-5 days depending on the type of bean.
In this step-by-step guide, we will walk you through the process of sprouting beans, ensuring you achieve successful sprouts every time. So, let’s get started!
How to Sprout Beans: A Step-by-Step Guide
Sprouting beans is an ancient practice that has gained popularity in recent years due to its health benefits. By sprouting beans, you initiate the germination process, which breaks down complex compounds and increases the availability of nutrients. Sprouts are rich in vitamins, minerals, antioxidants, and enzymes, making them a valuable addition to any diet.
Now that we understand the benefits, let’s move on to the step-by-step process of sprouting beans.
Choosing the Right Beans
The first step in sprouting beans is selecting the right type of beans. While nearly any legume can be sprouted, some beans are better suited for sprouting due to their size and germination characteristics. Good options for sprouting include mung beans, lentils, chickpeas, and alfalfa seeds.
Soaking the Beans
Rinse and Sort: Start by rinsing the beans thoroughly under cool running water to remove any dust or debris. Sort through the beans and discard any damaged or discolored ones.
Soak Overnight: Place the beans in a bowl or a sprouting jar and add enough water to cover them generously. Allow the beans to soak overnight or for approximately 8-12 hours.
Draining and Rinsing
Drain the Beans: After the soaking period, drain the water from the beans using a colander or sieve. Ensure that all excess water is removed.
Rinse the Beans:
Rinse the beans with fresh water to remove any residual starch or impurities. Gently agitate the beans to ensure thorough rinsing.
Sprouting the Beans
Choose Sprouting Method: There are different methods for sprouting beans, including jar sprouting, tray sprouting, or using a sprouting bag. Select the method that suits your preference.
Follow Sprouting Time:
The sprouting time varies depending on the type of beans. In general, sprouts will start appearing within 2-4 days. Keep them in a warm and dark place, ensuring proper air circulation.
Providing Proper Conditions
Temperature and Humidity:
Beans sprout best in a warm and humid environment. Maintain a temperature around 70°F (21°C) and ensure adequate humidity by lightly misting the sprouts with water.
Avoid Direct Sunlight:
While beans require some light during sprouting, direct sunlight can cause them to dry out quickly. Place the sprouts in an area with indirect light.
Harvesting the Sprouts
Wait for Ideal Length:
Allow the sprouts to grow to your desired length. Most beans are ready for harvesting when the sprouts reach approximately 1-2 inches in length.
Harvest with Care:
Gently remove the sprouts from their sprouting container. Rinse them once again to remove any seed coats or loose hulls.
Storing and Using Sprouts
Refrigeration:
After harvesting, store the sprouts in a clean, airtight container in the refrigerator. They can stay fresh for up to a week.
Incorporating Sprouts:
Add sprouts to salads, sandwiches, wraps, stir-fries, or use them as a topping for soups and smoothies. They provide a delightful crunch and a burst of freshness to your meals.
Troubleshooting
Sprouting beans is a straightforward process, but occasionally, you may encounter some issues. Here are a few common troubleshooting tips:
Mold or Foul Odor:
If you notice mold or a foul odor during the sprouting process, it’s best to discard the batch and start over. Ensure proper ventilation and avoid over-soaking the beans.
Slow Sprouting:
If the beans take longer to sprout, check the temperature and humidity conditions. Adjust them accordingly to promote sprout growth.
Can I sprout any type of bean?
While most beans can be sprouted, some varieties are better suited for sprouting due to their size and germination properties. Mung beans, lentils, chickpeas, and alfalfa seeds are commonly used for sprouting.
Can I eat sprouts raw?
Yes, sprouts can be consumed raw. However, ensure that you wash them thoroughly before consumption to minimize the risk of bacterial contamination.
How long do sprouted beans last in the refrigerator?
When stored properly in an airtight container in the refrigerator, sprouts can stay fresh for up to a week.
Can I freeze sprouts for later use?
While sprouts can be frozen, they may lose some of their crunchiness and texture. It’s best to consume them fresh or store them in the refrigerator for short-term use.
Are sprouts safe for pregnant women?
Pregnant women should exercise caution when consuming sprouts due to the risk of bacterial contamination. It’s advisable to cook sprouts thoroughly before consumption to minimize any potential health risks.
Conclusion
Sprouting beans is a wonderful way to boost the nutritional value of legumes while enhancing their digestibility. By following this step-by-step guide, you can easily sprout beans at home and enjoy the health benefits they offer. Experiment with different types of beans and incorporate sprouts into your meals to add a fresh and nutritious touch. So, get sprouting and unlock the power of sprouted beans!


