Are you interested in growing your own food either for personal consumption or for small scale farming business? A great way to do that is to start a farm at home.
There are numerous ways to begin home farming, regardless of whether you have a sizable backyard or only a few pots on a balcony.
But how do you get started? This beginner’s manual will give you the fundamental knowledge you need to begin farming at home, including advice on selecting the best crops, getting your soil ready, and controlling pests and diseases.
[Beginners Guide] How to Start Farming at Home
Starting a farm at home can be a fulfilling and rewarding experience. If you’re looking to start farming at home, it’s a great way to get fresh produce right at your doorstep. Here are some beginner’s steps that can help you get started:
Step 1: Decide on What You Want To Grow
Deciding what to grow is an essential first step in starting your home farm. Take some time to consider what you enjoy eating and what you’d like to grow.
If you’re just starting, it’s best to keep things simple and choose a few easy-to-grow plants.
If you’re interested in growing vegetables, think about what vegetables you enjoy eating and what grows well in your climate.
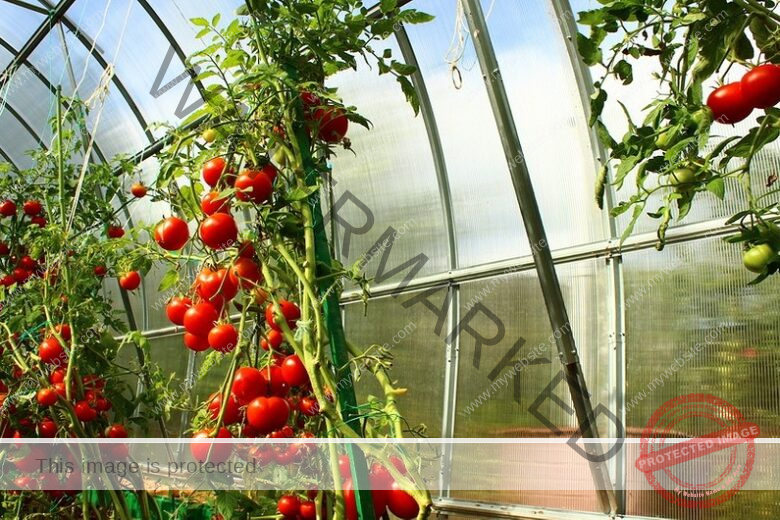
Common vegetables to grow at home include tomatoes, lettuce, cucumbers, and peppers. You could also consider growing root vegetables like carrots, beets, and potatoes.
If you prefer fruits, think about what fruits you enjoy eating and what grows well in your area. Common fruits to grow at home include strawberries, blueberries, raspberries, and blackberries. You could also consider growing citrus fruits if you live in a warm climate.
Herbs are another popular choice for home farming. You can grow herbs like basil, parsley, thyme, and mint. Herbs are easy to grow and can add a lot of flavor to your meals.
If you’re interested in growing flowers, think about what flowers you enjoy looking at and what grows well in your area. You can grow flowers like sunflowers, zinnias, and marigolds to brighten up your garden.
Once you’ve decided what you want to grow, do some research to find out what kind of soil and climate conditions are best for those plants. Your plants will grow more robustly and healthily as a result of this.
Step 2: Assess Your Available Space
Before starting your home farm, it’s important to assess the space you have available. The size and layout of your space will determine the type and amount of plants you can grow.
If you have a large yard, you’ll have more space to work with and can grow a wider variety of plants. If you live in an apartment or have limited outdoor space, you can still grow plants in containers or on a balcony.
When assessing your space, consider factors such as the amount of sunlight the area receives, the quality of the soil, and the availability of water.
Most plants require at least six hours of direct sunlight per day, so it’s important to choose a location that receives adequate sunlight.
If you have limited sunlight, consider growing plants that can tolerate partial shade or using grow lights.
The quality of your soil is also important for the growth of your plants. If you have poor soil, you can improve it by adding organic matter such as compost, manure, or peat moss. If you’re using containers, make sure they have adequate drainage and are filled with high-quality soil.
In addition to outdoor space, you can also grow plants indoors. An indoor farming, for example, can be grown on a windowsill or under grow lights. Some vegetables, such as cherry tomatoes or lettuce, can also be grown indoors using hydroponic systems.
Growing crops indoors is done using growing trays or pots as well as soil mixtures specifically for growing plants in containers.
Step 3: Prepare The Soil
Preparing the soil is a crucial step in starting a successful home farm. The quality of your soil will determine the health and growth of your plants, so it’s important to take the time to properly prepare it.
The first step in preparing your soil is to remove any weeds, rocks, or debris from the area where you plan to grow your plants. This will create a clean and clear space for your plants to grow, and prevent any potential competition for nutrients.
Once the area is cleared, you’ll need to improve the quality of the soil by adding organic matter. This can include compost, manure, or fertilizer.
Organic matter helps to improve the soil structure, increase the water-holding capacity, and provide essential nutrients for plant growth.
To add organic matter, spread a layer of compost or manure over the soil and mix it in using a tiller or garden fork. Alternatively, you can sprinkle a slow-release fertilizer on the soil and mix it in.
The amount and type of organic matter you’ll need will depend on the type of plants you’re growing and the quality of your soil.
It’s also important to test the pH level of your soil to ensure it’s at the optimal range for your plants. The majority of plants prefer a pH of 6.0 to 7.0 in their soil, which is slightly acidic. A soil testing kit is available online or at your neighborhood garden center.
Step 4: Choose Your Plants
Choosing the right plants is a critical step in creating a successful home farm. When selecting plants, it’s important to consider your local climate and soil conditions.
Different plants have different requirements for sunlight, water, and temperature, so it’s essential to choose plants that will thrive in your specific environment.
One way to determine which plants will grow well in your area is to consult with local nurseries or gardening centers.
These experts can provide valuable advice on what to plant, taking into account your local climate, soil type, and growing conditions.
They can also provide recommendations for specific varieties of plants that are known to do well in your area.
Another factor to consider when choosing plants is the amount of space you have available.
Some plants, such as tomatoes or squash, require more room to grow than others, like herbs or lettuce. Make sure you select plants that will fit comfortably within your available space.
In addition to considering the growing conditions and space requirements, you should also consider the purpose of your home farm.
If you’re growing vegetables or herbs for consumption, choose plants that you enjoy eating and will use in your cooking.
If you’re interested in creating a beautiful outdoor space, consider planting flowers or ornamental plants.
Step 5: Plant Your Seeds
Planting your seeds properly is a critical step in starting your home farm. The success of your plants will depend largely on how well you plant them and the care you give them during the early stages of growth.
Before you begin planting, make sure you have all the necessary supplies on hand, including seeds, soil, a watering can or hose, and any additional tools or materials that may be required.
For smaller seeds, you can create a shallow furrow in the soil using a small garden tool or your finger. Place the seeds into the furrow at the recommended depth, and cover them with soil.
For larger seeds, such as those for beans or corn, you can plant them directly into the soil at the recommended depth.
When spacing your seeds, make sure to leave enough room for each plant to grow to its full size. Overcrowding can lead to competition for nutrients and space, resulting in stunted growth or poor yields.
Use a ruler or measuring tape to ensure that you are spacing your seeds at the correct distance.
After planting your seeds, make sure to water them thoroughly. Seedlings need to be kept moist in order to germinate and begin growing.
Use a watering can or hose to gently water the soil around the seeds, taking care not to wash them away or damage them.
More so, it’s important to protect your newly planted seeds from pests and other threats. Covering the soil with a layer of mulch can help to retain moisture and discourage weed growth, while also protecting your seeds from hungry birds or insects.
Step 6: Water Your Plants
For your plants to grow and stay healthy, you must water them frequently. However, it’s important to find the right balance and not overwater them, which can be just as harmful as not watering them enough.
When it comes to watering, the frequency and amount of water your plants need will depend on a number of factors, including the type of plant, the climate, and the soil conditions.
As a general rule, most plants require about an inch of water per week, either from rain or from watering.
To determine if your plants need watering, check the soil moisture level by inserting your finger into the soil up to the first knuckle.
Watering should be done if the soil feels dry. You can wait a day or two before checking it again if it’s still moist.
When you water your plants, make sure to water the soil directly, rather than the leaves. By doing so, disease and fungus growth are reduced.
Use a watering can or a hose with a spray nozzle to control the flow of water and avoid flooding the soil.
Step 7: Provide Sunlight
Sunlight is one of the most important factors for the growth and development of your plants. It’s essential for photosynthesis, the process by which plants convert sunlight into energy to fuel their growth.
Providing the right amount of sunlight can help your plants grow stronger, produce more leaves, and ultimately, yield a better harvest.
To ensure your plants receive enough sunlight, you’ll need to consider a few factors. First, the amount of sunlight your plants need will depend on the type of plant you’re growing.
For example, some plants, like tomatoes and peppers, require full sun, while others, like herbs and leafy greens, can tolerate partial shade.
Second, you’ll need to consider the location of your garden. Ideally, you’ll want to choose a spot that receives at least six hours of direct sunlight per day.
If you’re growing in a shaded area, consider using reflective surfaces or planting shade-tolerant plants.
If you don’t have access to enough natural sunlight, you can use artificial grow lights to supplement your plants’ light needs.
There are a variety of grow lights available on the market, including fluorescent, LED, and high-intensity discharge (HID) lights.
Choose a grow light that’s appropriate for the type of plants you’re growing and the size of your growing area.
When using grow lights, it’s important to position them at the correct distance from your plants. Too close, and the heat from the light can damage your plants.
Too far away, and your plants won’t receive enough light. Consult the manufacturer’s instructions for guidance on the appropriate distance and duration of light for your plants.
In addition to sunlight, it’s important to provide your plants with shade during the hottest part of the day, especially in areas with high temperatures or intense sunlight.
You can use shade cloth or strategically placed plants to provide some relief from the sun’s heat.
Step 8: Maintain Your Plants
Maintaining your plants is an important step in ensuring that your home farm continues to thrive.
Weeds can quickly take over your garden, stealing vital nutrients and sunlight from your plants. Regularly remove weeds by pulling them out by the roots or using a hoe or other weeding tool.
It’s best to remove weeds when they’re small to prevent them from spreading and becoming more difficult to remove.
In addition to removing weeds, it’s important to maintain your plants by pruning them, removing dead leaves, and checking for signs of disease or pests.
Your plants will become stronger and produce more fruit or flowers if you prune them. As they can harbor disease and pests, dead or yellowing leaves should be removed.
Keep an eye out for any signs of disease or pests, such as wilting, yellowing leaves, or holes in the leaves.
If there are any problems, act right away to stop them from getting worse. There are a variety of organic pest and disease control methods available, such as spraying with neem oil or using companion planting to repel pests.
Step 9: Harvest Your Crops
Once your plants have matured, it’s time to harvest your crops. Harvesting your crops at the right time is important for ensuring the best flavor and quality.
Different plants have different harvesting times, so be sure to research the optimal time to harvest your specific plants.
To avoid harming the plant, use pruning shears or sharp scissors when harvesting. Be gentle when harvesting, especially with delicate fruits or vegetables, to avoid bruising or damaging them.
Enjoy the fresh, homegrown produce that you’ve grown yourself, and feel proud of your successful home farm!
Benefits of Farming at Home
- Access to fresh, healthy produce: Home farming allows you to grow your own fresh fruits, vegetables, and herbs, providing you with access to healthy, nutrient-rich produce.
- Cost savings: Home farming can help you save money on groceries, as you can grow your own produce instead of buying it from the store.
- Environmental benefits: Home farming can be done using organic and sustainable practices, which are better for the environment and reduce your carbon footprint.
- Improved mental health: Gardening and home farming have been shown to have mental health benefits, such as reducing stress and anxiety and improving mood.
- Educational opportunities: Home farming can be a great way to teach children about where their food comes from and the importance of sustainable agriculture.
Challenges of Farming at Home
- Limited space: If you live in an apartment or have a small yard, you may have limited space for gardening, which can limit the amount of produce you can grow.
- Time commitment: Home farming requires a significant time commitment, including preparing the soil, planting and caring for the plants, and harvesting the produce.
- Knowledge and skill: Home farming requires knowledge and skill in areas such as soil preparation, plant care, and pest control. To develop these abilities, it may take some time and effort.
- Weather conditions: Outdoor home farming is subject to weather conditions, such as extreme temperatures, drought, or excessive rain, which can impact plant growth and productivity.
- Pest and disease management: Home farming can be vulnerable to pests and diseases that can damage or destroy crops. Managing these issues can be challenging and time-consuming.
Best Practices of Farming at Home
- Start small: If you’re new to home farming, it’s best to start with a small garden and expand as you gain experience and confidence.
- Test the soil: Test your soil to determine its pH level and nutrient content. This will help you choose the right plants and fertilizers to use.
- Compost: Composting is a great way to cut waste and give your plants nutrient-rich soil. You can compost food scraps, yard waste, and other organic matter.
- Mulch: Use mulch to help retain moisture in the soil and control weed growth. Organic mulches such as wood chips or straw can also help improve soil quality over time.
- Rotate crops: Rotating crops each year can help prevent the buildup of pests and diseases in the soil.
Best Crops to Plant at Home
- Tomatoes: Tomatoes are one of the most popular crops to grow at home. They require plenty of sunlight and consistent watering, but with proper care, they can produce an abundant harvest.
- Salad greens: Salad greens such as lettuce, spinach, and kale are easy to grow and can be harvested continuously throughout the growing season.
- Herbs: Herbs such as basil, thyme, and rosemary are easy to grow in containers and add flavor to a variety of dishes.
- Strawberries: Strawberries are a low-maintenance crop that can produce a sweet and juicy harvest. They can be raised either in the ground or in containers.
- Cucumbers: Cucumbers are a prolific crop that can grow quickly and provide a bountiful harvest. They need lots of sunlight and water.
Disadvantages of Farming at Home
- Limited space: As mentioned before, limited space can be a disadvantage, which can limit the amount of produce you can grow.
- Time commitment: Home farming requires a significant time commitment, which may be difficult to manage for people with busy schedules.
- Cost: Although home farming can save money on groceries in the long run, it can require an initial investment in tools, equipment, and soil amendments.
- Weather conditions: Weather conditions such as extreme temperatures, drought, or excessive rain can impact plant growth and productivity.
- Pest and disease management: As mentioned before, home farming can be vulnerable to pests and diseases that can damage or destroy crops. Managing these issues can be challenging and time-consuming.
I Want To Be A Farmer Where Do I Start
Starting a career as a farmer can be a challenging but rewarding journey. If you’re interested in pursuing farming as a career, here are some steps to consider:
#1. Get Educated:
Start by researching the basics of farming, such as crop and soil management, animal husbandry, and business planning. You can take classes, attend workshops, or seek guidance from experienced farmers.
#2. Gain Experience:
Gain practical experience by working on a farm, volunteering, or interning with a farm organization. This will help you learn about the daily tasks and challenges of farming.
#3. Create a Business Plan:
Create a business plan that outlines your farming goals, marketing strategy, and financial projections. This will help you determine the feasibility of your farm and secure funding.
#4. Secure Financing:
There are various financing options available for aspiring farmers, including grants, loans, and crowdfunding. Research and apply for financing options that suit your needs and goals.
#5. Start Small:
Starting small is a great way to minimize financial risks and gain experience. You can begin by growing a small vegetable garden, raising chickens, or renting a small piece of land.
How To Start Farming with No Money
Starting a farm with no money can be challenging, but it’s not impossible. Here are some steps you can take to start farming with no money:
#1. Start Small
Start by growing a small garden or raising a few chickens. This will allow you to gain experience and generate some income to reinvest in your farm.
#2. Utilize Local Resources
Seek out local resources, such as land grants, cooperative extension offices, and community gardens. These resources can provide you with access to land, tools, and other resources.
#3. Barter and Trade
Consider bartering or trading goods and services with other farmers or community members. You can exchange produce for labor, tools, or other resources.
#4. Crowdfunding
Consider using crowdfunding platforms to raise funds for your farm. This can be an effective way to generate support and funding from your community.
#5. Seek Out Farming Apprenticeships
Many farms offer apprenticeships, which provide hands-on training and education in exchange for labor. This can be a great way to gain experience and build your farming network.
Farming Tips for Beginners
- Start small: If you’re new to farming, start with a small area of land and grow a few crops or raise a few animals. You’ll develop your skills and gain experience as a result of this.
- Research: Research the crops or animals you want to farm and learn about their growth requirements, disease control, and marketing options.
- Soil preparation: Prepare your soil before planting by removing weeds, debris, and rocks. Add compost, manure or fertilizers to improve soil quality.
- Crop rotation: To maintain healthy soil and prevent pest and disease build-up, rotate your crops every season.
- Watering: Water your crops regularly but avoid over-watering which can lead to water-logging and other plant diseases.
- Pest control: Monitor your crops for pests and diseases, and use natural methods of control, such as companion planting or beneficial insects, before resorting to chemicals.
- Marketing: Develop a marketing plan and identify potential customers for your products, such as farmers’ markets or restaurants.
How To Start a Farm from Scratch
- Create a business plan: Develop a business plan that outlines your goals, target market, and financial projections. This will help you secure financing and stay on track with your farm business.
- Identify your resources: Determine what resources you have available, such as land, equipment, and labor, and what resources you need to acquire.
- Secure financing: Research and apply for financing options, such as loans or grants, to help fund your farm.
- Develop infrastructure: Build the infrastructure you need, such as fencing, irrigation systems, and buildings, to support your farm operations.
- Choose crops and/or animals: Choose crops and/or animals that are well-suited to your climate and soil conditions, and that have a high demand in your target market.
- Start small: Start with a small area of land and a few crops or animals, and gradually expand as your farm business grows.
- Network with other farmers: Join farming organizations and networks to connect with other farmers, learn from their experiences, and share knowledge and resources.
Conclusion
Starting a farm at home requires some effort, but it’s an excellent way to get fresh, healthy produce right at your doorstep. By following these beginner’s steps, you’ll be well on your way to growing your own farm at home.